


Rows and Hierarchy
In a Sheet, rows are the essential element. Rows include information such as task name, customer name, order information, etc. In a row, we can also add some information like comments and attachments. In a row, there is a reminder which we can use to keep track of the essential items like due dates. In Smartsheet, the information can also be shared with the help of the send row option, and for updating on row items, we can request from the team members.
Smartsheet provides a wonderful feature of indent tool. With the help of an indent tool, we can create a row hierarchy. So, in a project, instead of using hundreds of rows, we condense the data so that we can only focus on a specific aspect.
Hierarchy: Indent or Outdent Rows
Indent row means making a hierarchy on a sheet. If we indent a row, it becomes the child of the row that is above it. We can only create the hierarchy from the child row; it means we cannot generate the hierarchy from the parent row.
How to Indent a Row
There are various steps which we use to indent a row:
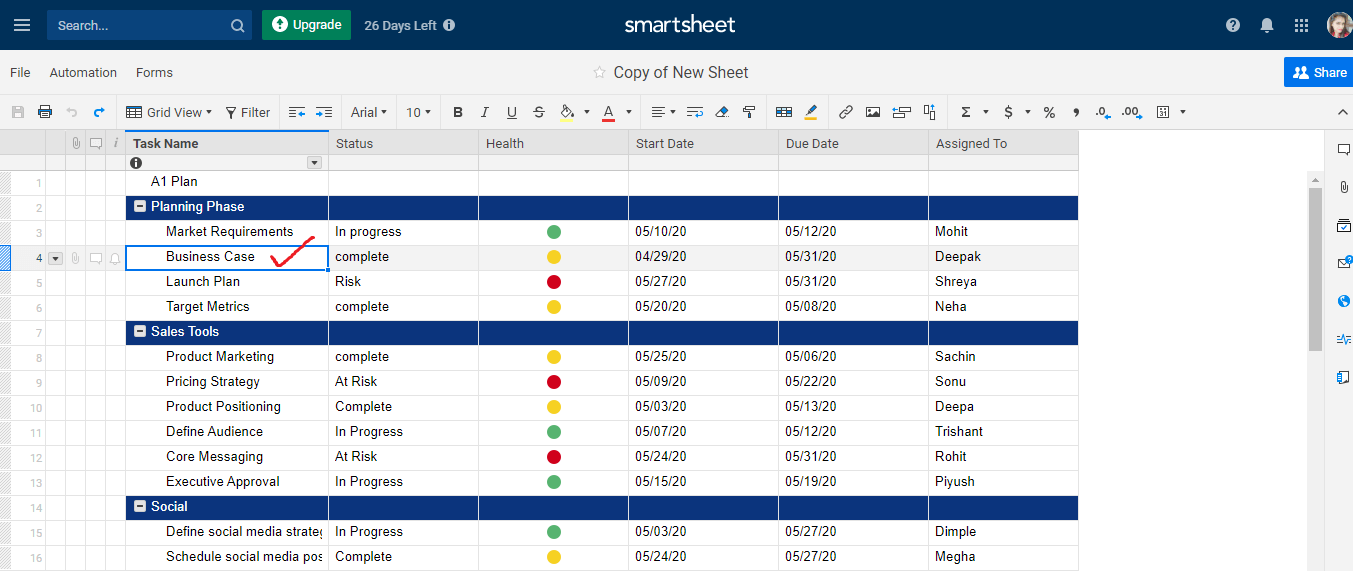
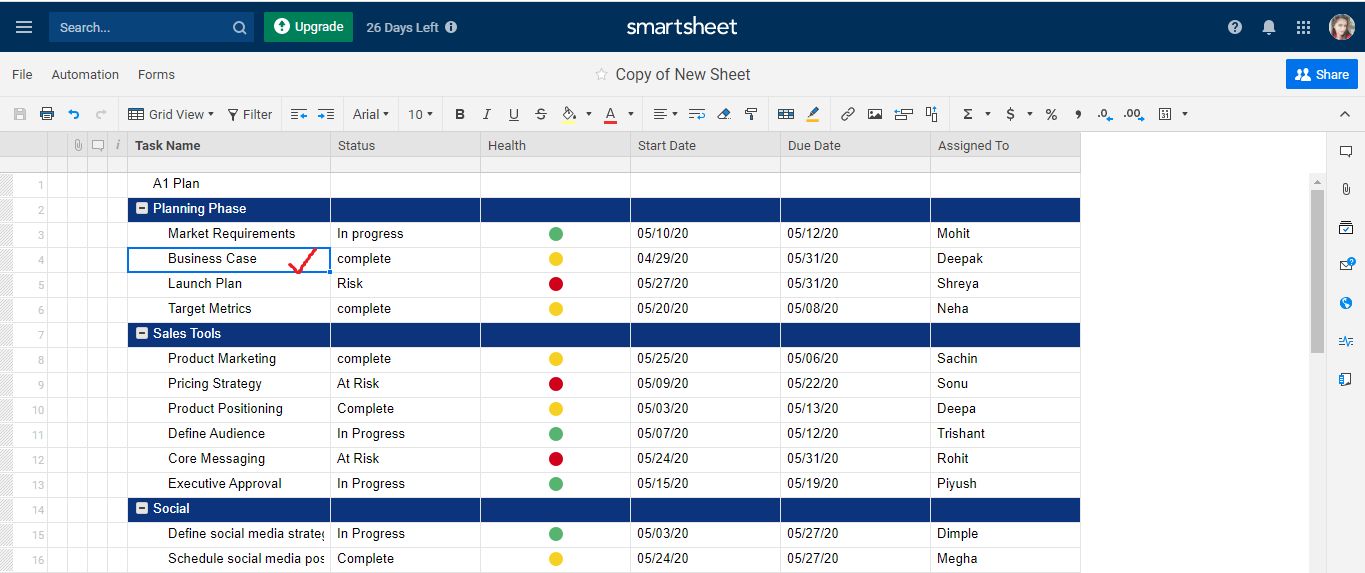
Step 1. To indent a row, select that row which we want to indent. Then right-click on that row. We can easily see in the below figure that we have selected a row named Business case.
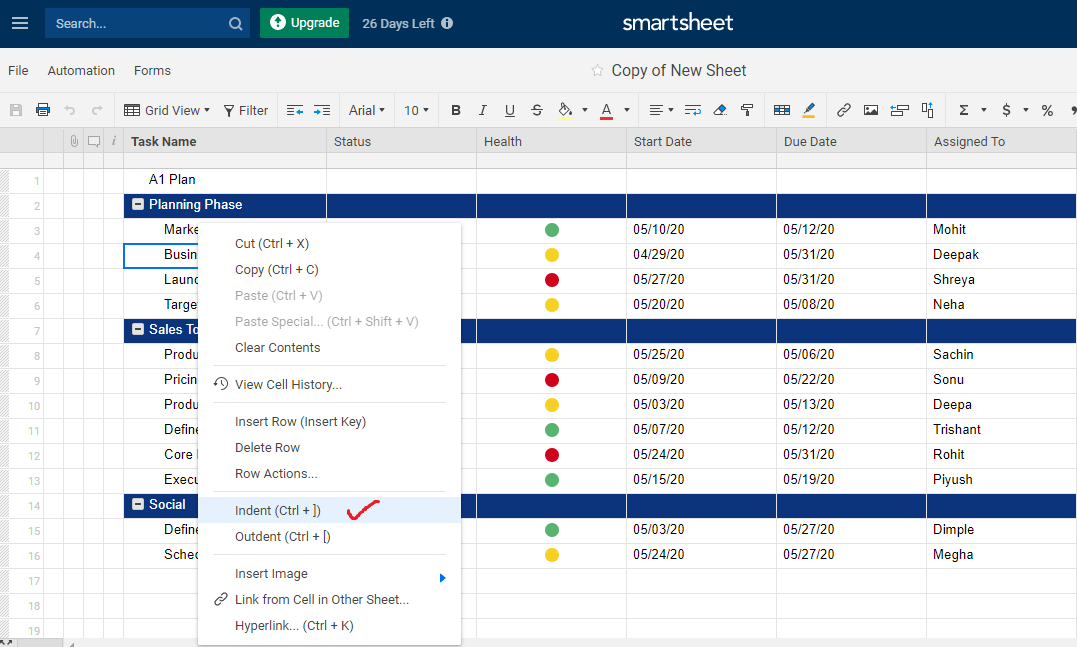
Step 2. Next, we click on the Indent option
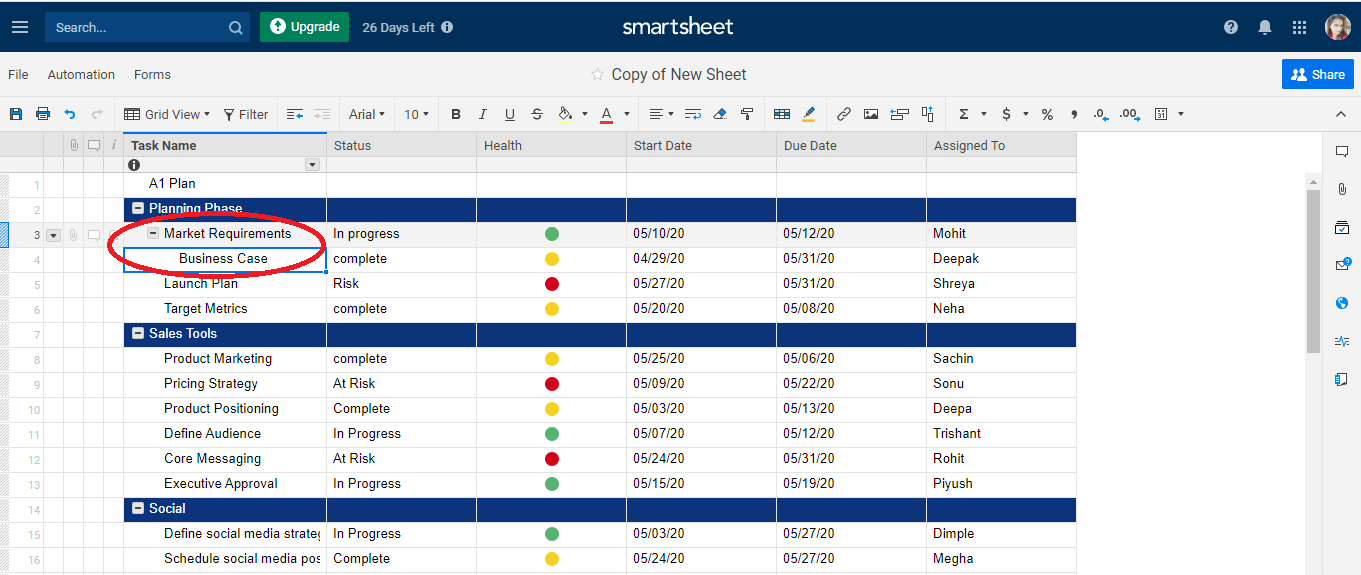
Step 3. Now, we can see in the below figure that the row is indented and has become the child of the row, above it.
Remove Hierarchy
Remove Hierarchy means outdent a row.
There are various steps to remove hierarchy:
Step 1. To remove the hierarchy, select the row in which we want to remove hierarchy. In the below figure, we can easily see that we have selected a row named Business Case.
Step 2. Then, right-click on a cell of a row which we want to outdent or remove hierarchy and click on the Outdent option.
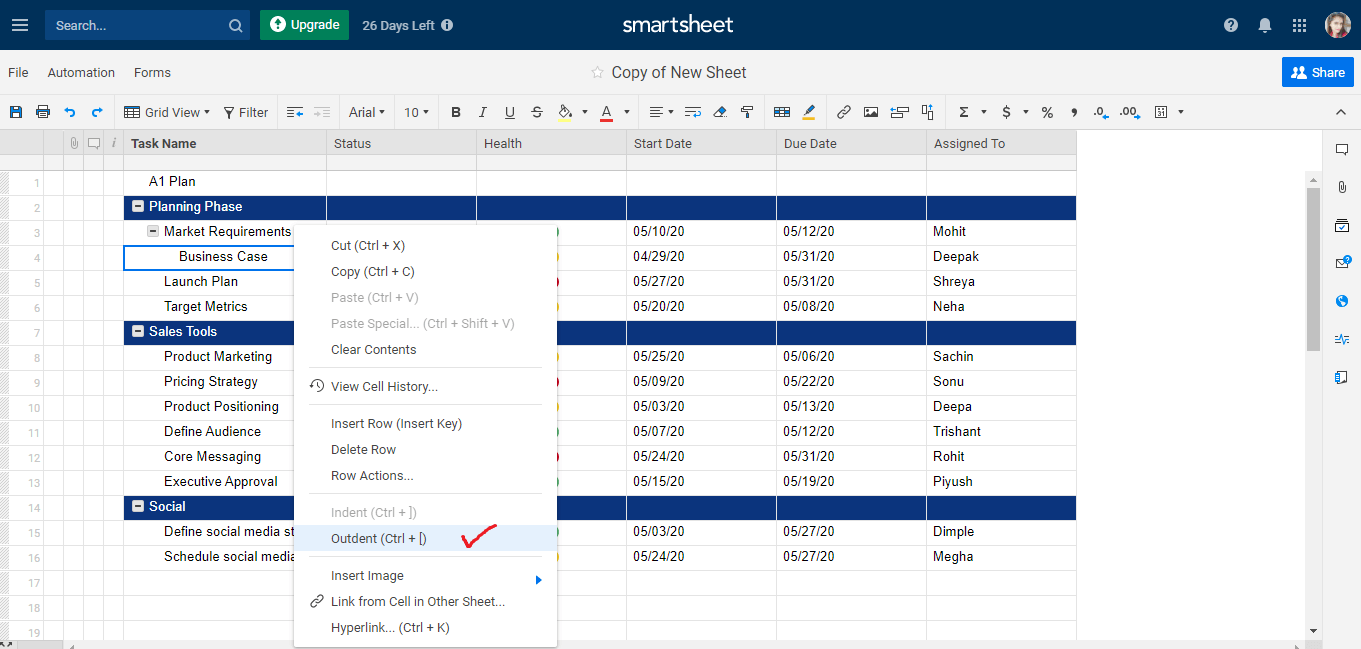
Step 3. We can easily see in the below figure the row after removing hierarchy or outdenting a row.
Hierarchy Best Practices
There are some essentials points which we have to keep in our mind while working with hierarchy:
- There is no limit to indent. We can apply it to any number of rows according to the need.
- If we want to delete a parent row, we also have to delete the indented child rows. It means we cannot delete the parent row without deleting the child row, which is indented.
- If we click the row which contains the items below it, the child row will move along with that item which we selected.
Column Type Refrence
Columns in Smartsheet are the same as the columns in a spreadsheet except that the Smartsheet column contains some unique features that make the Smartsheet more powerful and easier. Column type means the type of data that is allowed to enter into a column. In the Smartsheet, we work with configurable columns and default columns.
- Default Columns: - The column which we cannot remove or change is known as a Default column. In every sheet primary column is present. Primary column is obligatory we cannot delete the primary column from the sheet.
The column values are the key descriptor for the row. The column contains a type which is Text/Number.
There are various types of column display icons which we use to alert some row-specific activities:- The
 Icon used for Attachments: - Each row contains an icon for attachments. By using this, we can easily attach some attachments with the row. If we want to review the attachments, then click on the icon.
 - The
 Icon used for Comments: - Each row contains an item for comment. Comment icon is used for commenting. If we want to review the comment, then we have to click on the comment icon.
 - The
 Icon used for Row Action Indicators: - The row action indicators icon is used to display the icon for update requests, pending reminders, allocation alerts, and locks that are linked with the row.
- The
- Primary Column: - The column which we cannot change is known as Primary column. The primary column is a column that has a type of Number or Text.
- Configurable Columns:- In the Smartsheet, there are various types of configurable columns:
- Text/Number
- Contact List
- Date
- Dropdown List (Single-Select)
- Dropdown List (Multi-Select)
- Checkbox
- Symbols
- Auto-Number/System
- Text/Number: - Text/Number column type comprises of text values, numeric values, or the combination of both values, i.e., text as well as numeric. For comment, Text/Number is the best selection. For project expenses, the number type is the best option.
- Contact List: - The contact list column type is used to store the values like an owner, assigned to, etc,. With the help of the contact list column type, we can contact the collaborators easily. In addition to that, the contact list column type is also helpful to send reminder and generate report which consists of the tasks list that is assigned to an individual team member.
If we use the contact list column type, by using different options, we can define the chosen contact values in the value box. Contact name and email address are the acceptable values for the contact list.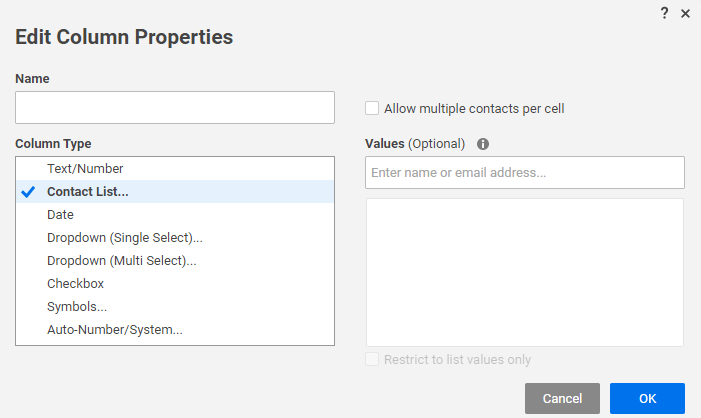
In the contact list, we can also set-up the preferred contacts, which helps to access the contact quickly only by clicking the dropdown arrow. - Date:- In the cell of the date column, there is a calendar icon. By clicking on the calendar icon, we can easily choose a specific date. If we want to type a date manually, it is also allowed in the date column. The date column type is helpful in displaying the items in the calendar view.
There are various formats of date in the smartsheet. We can set up the format of the date with the help of personal settings in the smartsheet account.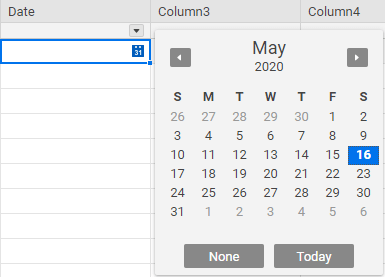
- Dropdown List (Single-Select): - The dropdown list contains a list of values. We select one value from the list of values.
If we want to remove any item from the dropdown list, first select that item, which we want to remove and then click on the delete button or backspace.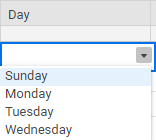
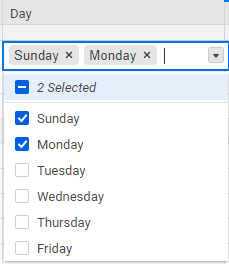
- Dropdown List (Multi-Select): - The dropdown list (multi-select) contains the list of values. We can select multiple values from the list of values. When we use dropdown list (multi-select) option, then we can type the values to be used in the list.
- Checkbox: - Checkbox column contains the checkbox, which can be checked or unchecked.
- Symbols: - In the Symbol table, visual images are present. The symbol column is used to specify the status of the row. In the symbol column, we cannot add any symbol manually.
- Auto-Number/System: - Auto-Number/System is the type of column in which the values for each row are generated automatically. We use Auto-Number/System when we need to enter values like the part number, Invoice number, row IDs, customer numbers, and so on.
0 Comments